


The game of hockey is played on one of the most difficult playing surfaces to properly build and maintain in all of sports. You cannot simply flood a rink, turn down the temperature, and let it freeze. It is a highly scientific process that has been researched and adapted over the years in an effort to create a perfect surface for both skaters and pucks to glide across. Some teams paint everything you see on the ice, while other teams use textile fabric logos which can be used over and over. The methods for building and maintaining an ice rink can vary between leagues and even between NHL teams. Here is a quick visual of the ice building process. After that, we will break down the details that go in to each step.

Preparing the Slab
The surface ice is kept at the required temperature by using a refrigeration system pumping a chemical called glycol through 10 miles of pipes embedded in the concrete slab below the skating surface. Crews will turn on these chillers and wait for the ice to be somewhere between 19°F and 24°F.
Once the rink is at the desired temperature, it is time to add water. It takes between 45,000 to 57,000 liters of water to build a hockey rink. The ice itself will only be between an inch to an inch and a quarter thick. Using a sprayer, or flood cart, crews will lightly mist the chilled concrete with water, which freezes instantly upon contact. They will repeat this step a few times to create just enough ice to stick to the floor.

Painting the Ice
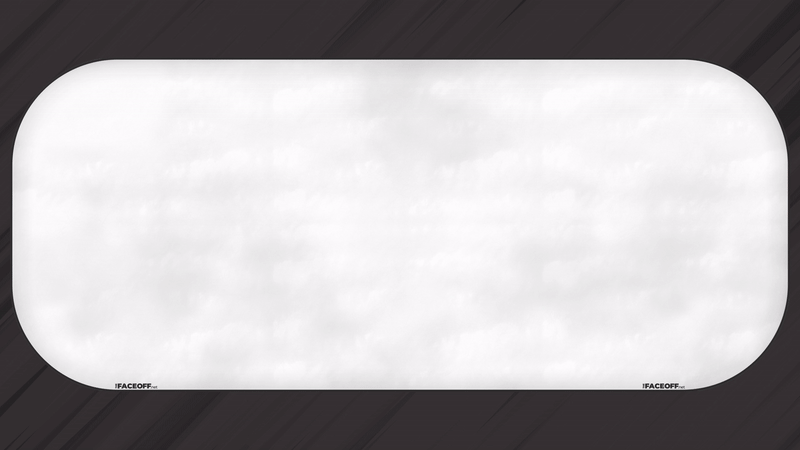
Now that there is a thin layer of ice to work with it is time to paint it white. NHL teams, and most professional rinks, use JetIce Super White 3000 paint. It comes in a powder and is mixed with water to basically make white water. Using a sprayer, or flood cart, the ice crew will circle the rink, making sure every inch of the ice is covered. This can take a few coats to give it that brilliant white look.
Once the entire rink is white, this layer is sealed in with a few more coats of a fine mist of water.

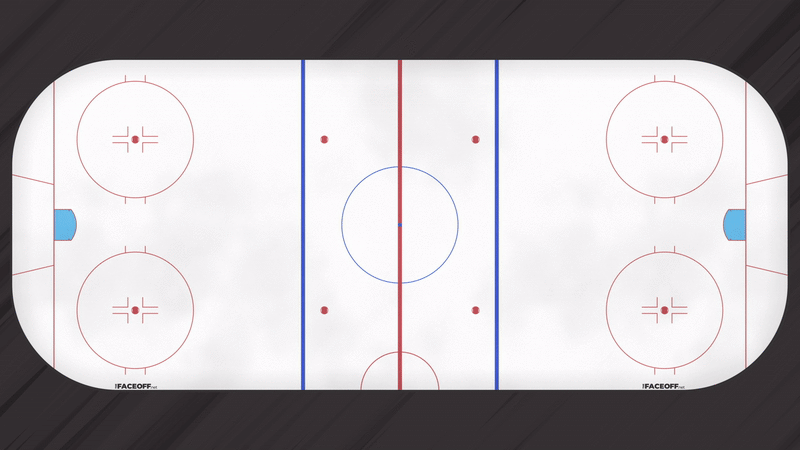
Paint the Hockey Markings
When it comes to adding the official hockey markings to the ice, there is no room for error. Each line, circle, and face-off dot must be carefully measured out before painting.
To make perfectly straight lines for the goals, neutral zones, and the center-line, yarn is stretched from one side of rink to the other and frozen to the ice.
While some teams use large wooden stencils to paint the face-off dots, hashmarks, and goal creases, there are now teams who use textile fabric to speed up the process.
The circles require a stick with a special foam brush on the end. These are attached to a bar which is anchored at the center of the circle's position. This allows the painter to travel in a perfect circle with the brush.
The red line for the NHL must always have a 2 inch outline, but between those outlines, any consistent pattern of red or white is allowed. This is where teams sometimes get creative. Traditional designs such as a checkered or diamond red line are often hand painted, while more complex designs such as team logos in the pattern are typically textile fabric lines.


Placing the Logos
Each league has their own rules and regulations regarding on ice logos. Some leagues have less than others. The NHL is quite strict but their restrictions also prevent the ice from getting littered with excessive advertising.
There are two common methods for painting the primary logos, advertisements, and arena logos on the ice. The first has dated back to the 1950's when teams started painting their logos on the ice. Using a stencil to trace out a design, the crew then paints the logo using nothing but brushes. Many teams still paint their primary logo by hand, including the Chicago Blackhawks who have a pretty complex logo with a lot of colors.
In more recent years, some teams have started using textile fabric which comes in several pieces to create a logo large enough to fill the 30ft center circle. Fabric logos are often used for arena word marks and advertisements, sometimes even if the primary logo is hand-painted. These logos are carefully positioned on the ice and a light mist of water is sprayed over them to freeze them in.
Once all markings and logos are placed, more layers of water are applied until the ice is built up to its final depth between an inch to an inch and a quarter.

Oilers TV's documentary series features how the ice at Rexall Place became the benchmark of the NHL.
How did the NHL maintain the ice in Edmonton for the 2020 Stanley Cup Playoffs with multiple games going on each day? Head over to Rinks Around The League to learn all about it.
%20and%205%20more%20pages%20-%20The%20Faceoff%20-%20Microsoft%E2%80%8B%20Ed.png)
Rink Removal
Once the season is over, one of the saddest things for a hockey fan to see is their favorite team's ice rink being removed.
While many teams will keep the ice in all season, there are some events that require the ice to be removed. A circus often requires structures to be bolted into the concrete. Events such as a State/National wrestling championship require more level floor space than the 85 feet width an NHL rink allows.
The Process
The first step is to turn off the chillers that have worked all season long to keep the slab at the optimal temperature. Some teams will even heat up the slab using the same system of pipes under the concrete.
Teams use various methods for breaking up the ice, though most in the NHL use heavy machinery such as a front-end loader. Any fabric logos will be carefully pulled out of the ice once enough of it has melted off. The boards around the ice are removed and located somewhere around the rink, you will find giant pit that can be uncovered. Here, all of the ice is pushed in and melted. Once the ice is gone, crews will clean up the remaining water, and dry the concrete.
Take a look at how it is done in Tampa Bay.